Below were the steps to Erase bootable ubuntu pendrive.
Step1: Insert the Pendrive

Step 2: Open GParted App in ubuntu.

Step 3: In the top right side corner, click on the dropdown to choose pendrive.

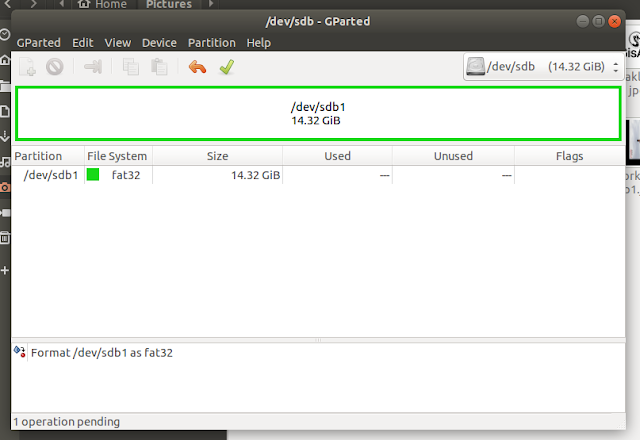
Step 4: Right click on the ubuntu partition, select format to option, in that select FAT 32.

Step 5: Apply the operation by click on the top middle 'Tick option'.
While doing the format, this will show below error operation windows. No problem with them, just ignore it. Click 'OK'.

Step 6: Once this operation completed, your pendrive spaces will become unallocated space(Its not free space).

Step 7: Now select the pendrive unallocated partition, In the menu bar, click on device and It will throw a drop down. Select 'Create Partition'.
Then you will get below window.
 Step 8: Select msdos as partition table type. Click Apply.
You will get more error like below. Just ignore them.
 Step 9: Once everything is done, You will again see the unallocated partition only.
Now select the 'unallocated partition' and In the menu bar, select 'Partition' in that menu bar select 'New Partition'.
Then you will get below window.

Step 10: Click 'Add'. Then Click on top middle 'Tick option' to apply the partition.
Confirm it to click 'Apply'.
This will lead to some error. Again Ignore them.


Step 11: Even all done, this will show the allocation as 'Unknown'. No worries.
Now remove the pendrive and connect it again.
Close the GParted App. Once pendrive plugged in again. Open GParted App.
 Goto Pendrive space. Right click the partition -> format to -> FAT 32.
Step 12: Once above partition is applied. you can see '15 GB pendrive' Mounted in your Folder list.
Once again do UI partition.

Thats! your pendrive is back and good!
Hope this helps!..
Step1: Insert the Pendrive

Step 2: Open GParted App in ubuntu.

Step 3: In the top right side corner, click on the dropdown to choose pendrive.

Step 4: Right click on the ubuntu partition, select format to option, in that select FAT 32.

Step 5: Apply the operation by click on the top middle 'Tick option'.
While doing the format, this will show below error operation windows. No problem with them, just ignore it. Click 'OK'.

Step 6: Once this operation completed, your pendrive spaces will become unallocated space(Its not free space).

Step 7: Now select the pendrive unallocated partition, In the menu bar, click on device and It will throw a drop down. Select 'Create Partition'.
Then you will get below window.

You will get more error like below. Just ignore them.

Now select the 'unallocated partition' and In the menu bar, select 'Partition' in that menu bar select 'New Partition'.
Then you will get below window.

Step 10: Click 'Add'. Then Click on top middle 'Tick option' to apply the partition.
Confirm it to click 'Apply'.
This will lead to some error. Again Ignore them.


Step 11: Even all done, this will show the allocation as 'Unknown'. No worries.
Now remove the pendrive and connect it again.
Close the GParted App. Once pendrive plugged in again. Open GParted App.


Step 12: Once above partition is applied. you can see '15 GB pendrive' Mounted in your Folder list.
Once again do UI partition.

Thats! your pendrive is back and good!
Hope this helps!..
Comments
Post a Comment